Understanding the Job Monitoring Dashboard: What is Printing Dashboard?
After a batch of jobs is approved in the Approval Engine, the Send for Printing button becomes available, prompting the user to move the jobs to the Printing Engine.
Clicking this button opens the Printing Dashboard.
How to Exclude Documents from Printing
Users can exclude documents from printing in two ways:
Using the Document List
1. Check or uncheck the box next to the document you want to exclude.
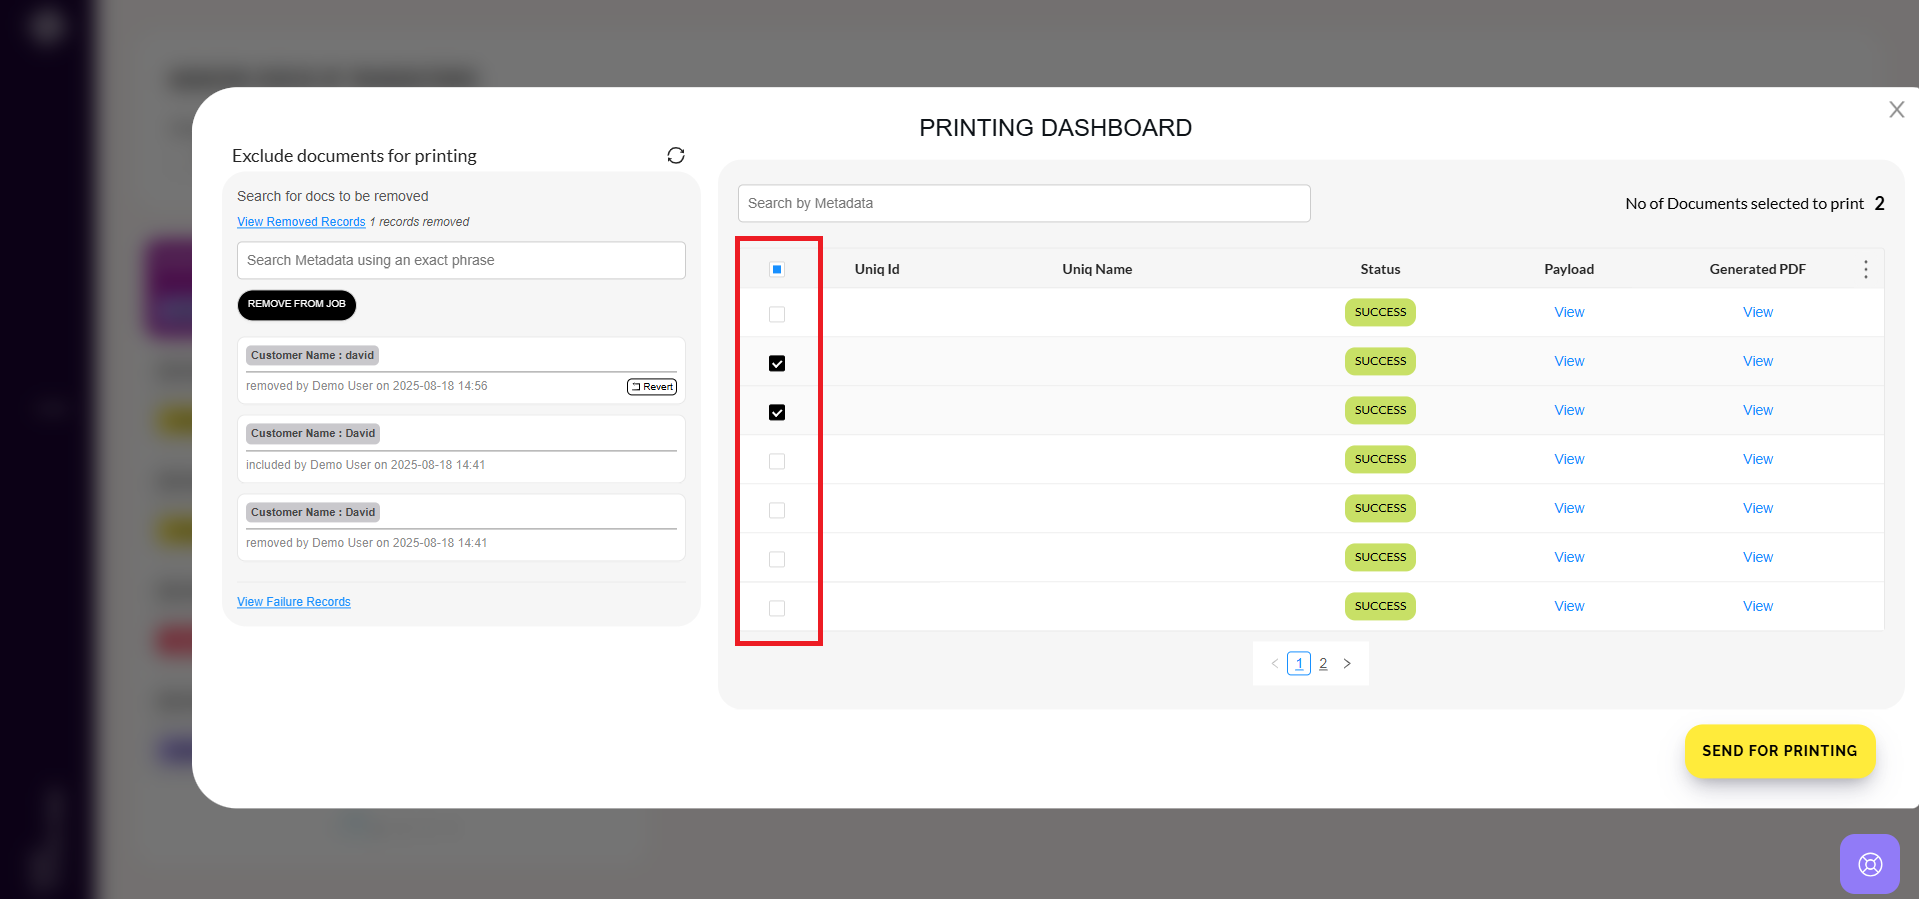
2. Alternatively, search for a specific document using the search bar and unselect it to remove it from printing.
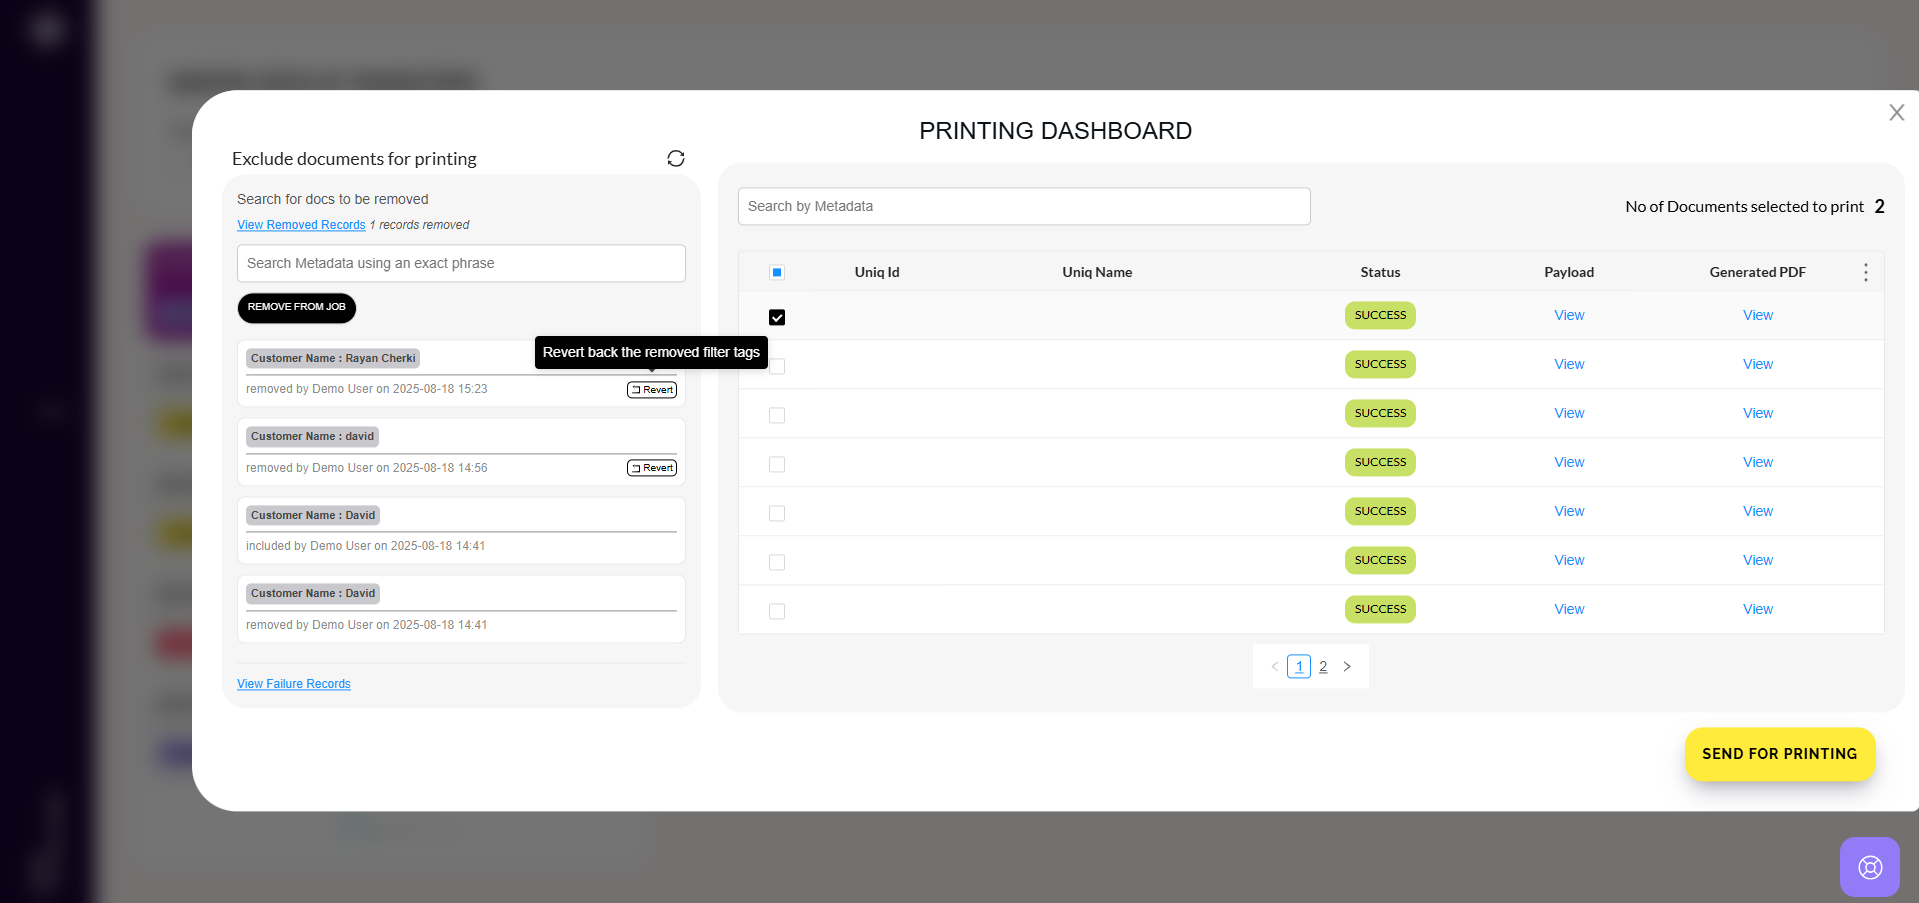
Using the “Exclude Documents from Printing” Section
1. Navigate to the Exclude Documents from Printing section on the left-hand panel.
1. Navigate to the Exclude Documents from Printing section on the left-hand panel.
2. Search for the document to be excluded using metadata such as Unique ID, Unique Name, Language, Customer Name, etc.
3. Select the job and click Remove to exclude it from printing.
If required, users can revert the exclusion by clicking the Revert button.
Once all unnecessary documents have been excluded, click the Send for Printing button to proceed with the remaining jobs.
Related Articles
Understanding the Job Monitoring Dashboard: What is Printing Engine?
Once the jobs are approved and sent for printing from the Printing Dashboard by clicking the Send for Printing button, they are queued in the Printing Engine, which displays the number of jobs awaiting printing in the current batch. Printing is ...Understanding the Job Monitoring Dashboard: What is Approval Engine?
The Approval Engine in Perfect Doc Studio is the module where jobs are reviewed and approved prior to printing. This process is applicable only when jobs are submitted through external APIs (e.g., Postman) with the approval flag enabled. How It Works ...Understanding the Job Monitoring Dashboard: What is Printing Center and Control Center?
Printing Center: The Printing Center allows users to track and review all documents that have been successfully printed. Unlike the Printing Engine, which displays jobs queued for printing, the Printing Center focuses on completed print jobs. Here’s ...Understanding the Job Monitoring Dashboard: Job Processing Center
The Job Processing Centre provides a detailed view of all jobs processed from the Job Queue, categorized separately as Documents and Emails. Separate Job Types: Both Documents and Emails are displayed distinctly, helping users assess each ...Understanding the Job Monitoring Dashboard: Job Queue
Job Queue The Job Queue in Perfect Doc Studio displays a real-time count of all submitted jobs (documents and emails) triggered via Live Upload, Draft Upload, or API. As jobs move through the system, this live counter decreases until all items are ...